LightSwitch Online Ordering System
An End-To-End LightSwitch Example
In this article, we will create an end-to-end application in LightSwitch. The purpose is to demonstrate how LightSwitch allows you to create professional business applications that would take a single developer weeks to create. With LightSwitch, you can create such applications in under an hour.
I have more LightSwitch tutorials on my site: http://LightSwitchHelpWebsite.com.
You can download LightSwitch at http://www.microsoft.com/visualstudio/en-us/lightswitch.
The Scenario
In this example, we will be tasked with producing an application that meets the following requirements for an order tracking system:
- Products
- Allow Products to be created
- Allow Products to have weight
- Allow Products to have a price
- Companies
- Allow Companies to be created
- Allow Companies to log in and see their orders
- Orders
- Allow administrators to see all Companies and to place an order for any Company
- Allow Companies who log in to see and place orders only for themselves
- Business Rules
- No single order can be over 10 pounds
- No single order can be over $100
- An order status must be one of the valid order types
Creating the Application

Open Visual Studio and select File, then New Project.
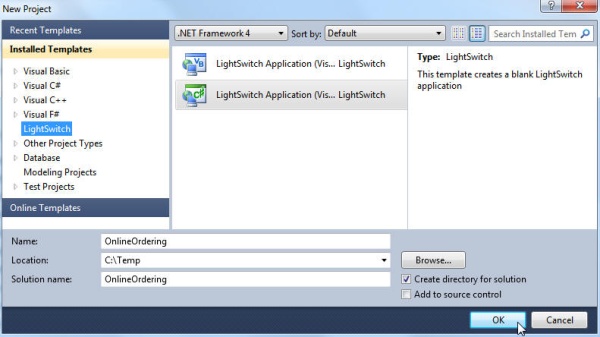
Select LightSwitch, and then the programming language of your choice. This tutorial will use C#.

In the Solution Explorer, open Properties.

Select Web as the Application Type, and indicate that it will be hosted in IIS.

Select Create new table.

Click on the table name to change it to Customer. Enter the fields for the table according to the image above.
(Note: we will also refer to the Tables as Entities, because when you are writing custom programming, it is best to think of them as Entities.)
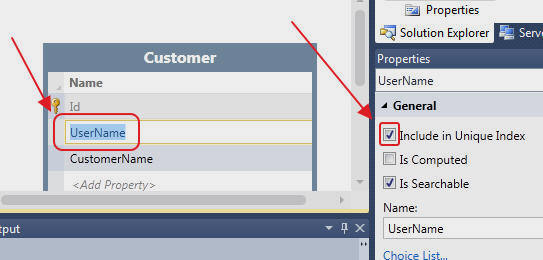
Click on the UserName field, and in the Properties, check Include in Unique Index. This will prevent a duplicate UserName from being entered.
LightSwitch does not allow you to create primary keys for Entities created inside LightSwitch (you can have primary keys for external tables you connect to). Where you would normally create a primary key, use the Include in Unique Index.

Right-click on the ApplicationData node to add a new Table (Entity).
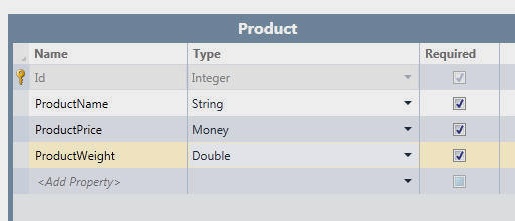
Add a Product Entity according to the image above.

Add an Order Entity according to the image above.

Add an OrderDetail Entity according to the image above.
Creating a Choice List
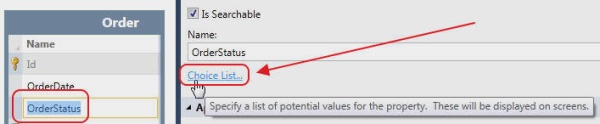
Open the Order Entity and select the OrderStatus field. In Properties, select Choice List.

Enter the choices according to the image above.
This will cause screens (created later) to automatically provide a drop down with these choices.
Connect (Associate) the Entities (Tables) Together
It is important that you create associations with all the Entities in your LightSwitch project. In a normal application, this would be the process of creating foreign keys (and that is what LightSwitch does in the background). Foreign keys are usually optional because most applications will continue to work without them. With LightSwitch, you really must create the associations for things to work properly.
It will be very rare for an Entity to not have one or more associations with other Entities.

Open the Order Entity and click the Relationship button.
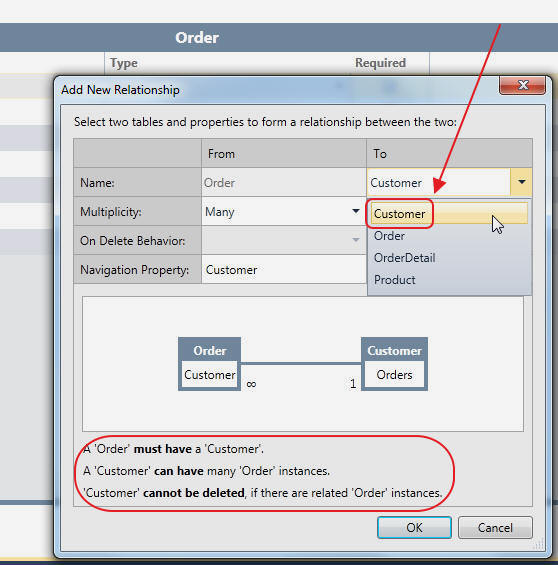
Associate it with the Customer Entity according to the image above.
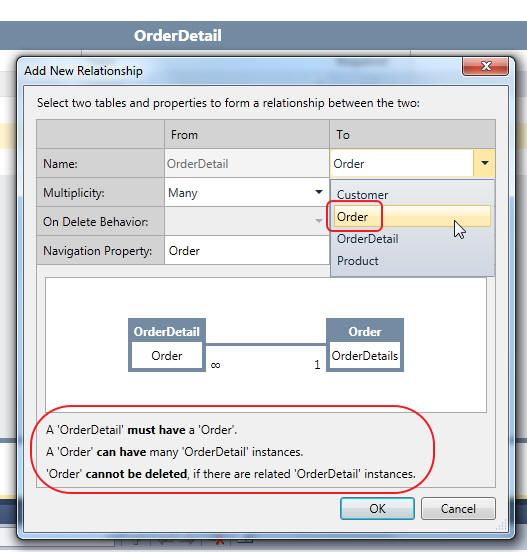
Repeat the process to associate the OrderDetail Entity to the Order entity according to the image above.
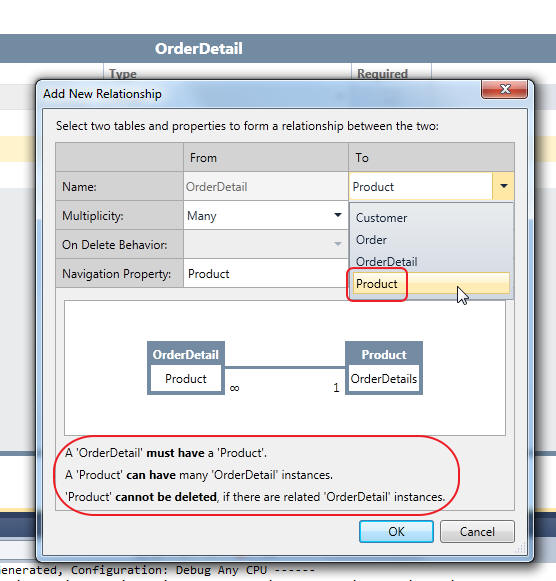
Repeat the process to associate the OrderDetail Entity to the Product entity according to the image above.
Create Computed Columns
A computed column is a column that shows data that isn't actually stored in a table. This is why I like to refer to them as Entities rather than tables. If you look in SQL Server, the table will not have the field, but when you write code against the Entity, the field is there.
The reason you have a computed field is that LightSwitch will automatically display the data on screens without you needing to write far more complicated code. For example, we want the total of an Order to be displayed. We could leave this calculation until later when we create the screens, or we can simply make a computed field now.
Later, we simply tell Lightswitch to display the Order Entity. The total for the Order will automatically be displayed.
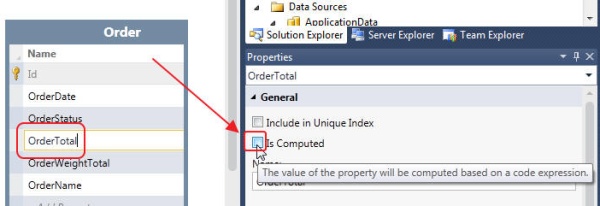
Click on the OrderTotal field, and check Is Computed in Properties.

Click Edit Method.
A method will display.
Change the method to the following:
partial void OrderTotal_Compute(ref decimal result)
{
    decimal dOrderTotal = 0.0M;

    // Get OrderDetails that have products
    var colOrderDetails = from OrderDetails in this.OrderDetails
                          where OrderDetails.Product != null
                          select OrderDetails;

    foreach (var order in colOrderDetails)
    {
        dOrderTotal = dOrderTotal + (order.Quantity * order.Product.ProductPrice);
    }

    result = dOrderTotal;
}
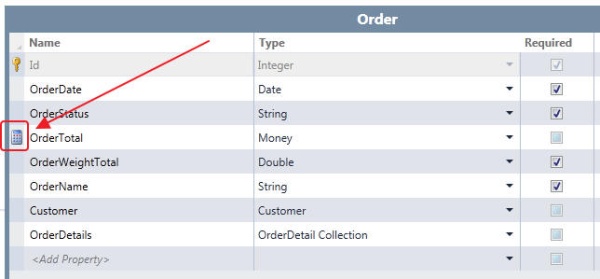
The calculator symbol will appear next to the OrderTotal field so you will know it is a computed field.
Make OrderWeightTotal and OrderName computed columns, and use the following code for their respective methods:
partial void OrderWeightTotal_Compute(ref double result)
{
    double dblWeightTotal = 0;

    // Get OrderDetails that have products
    var colOrderDetails = from OrderDetails in this.OrderDetails
                          where OrderDetails.Product != null
                          select OrderDetails;

    foreach (var order in colOrderDetails)
    {
        dblWeightTotal = dblWeightTotal +
           (order.Quantity * order.Product.ProductWeight);
    }

    result = dblWeightTotal;
}

partial void OrderName_Compute(ref string result)
{
    if (this.Customer != null)
    {
        result = String.Format("{0} [{1} {2}]",
          this.Customer.CustomerName, this.OrderStatus,
          this.OrderDate.ToShortDateString());
    }
}
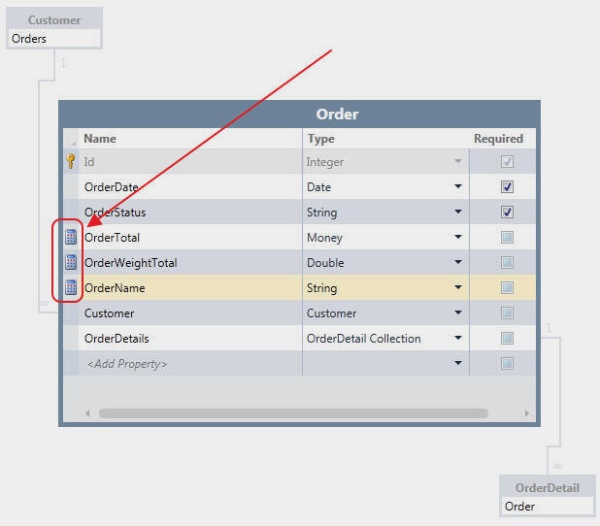
The Order table will resemble the image above.
While we could have created code on the LightSwitch screens to do much the same thing (we will create screens in a later step), the Entity (the Table) is the proper place for this code for two main reasons:
- The fields will automatically appear on any screen or dropdown the Entity appears on
- We can write code against the computed value
Validation Code
The purpose of validation code is to prevent an Entity record from being saved or updated when it does not meet certain rules. It is important to note that validation code only operates on one Entity at a time, however the "rule" can be based on data from multiple entities.
We can validate a single Field or an entire Entity. First, we will look at validating a single Field (or Property).
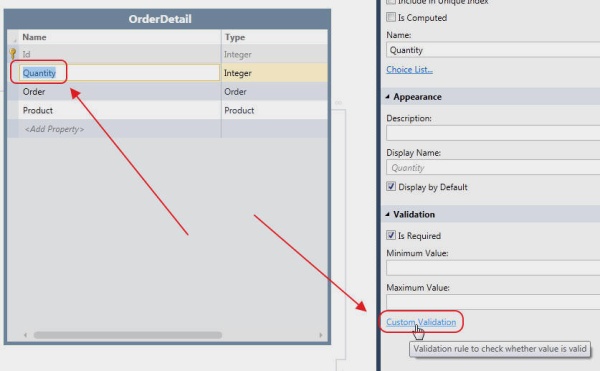
Open the OrderDetail Entity and click on the Quantity field. In Properties, click Custom Validation.
You will see a method that simply asks you to add a PropertyError to the results collection. The presence of an error will prevent the Entity from being saved and the error will show.
Change the method to the following:
partial void Quantity_Validate(EntityValidationResultsBuilder results)
{
    if (this.Quantity < 1)
    {
        results.AddPropertyError("Quantity must be greater than zero.");
    }
}
"this." is the entity being saved. We simply check to see that Quantity is greater than 0.
Now we will look at the Entity validation:
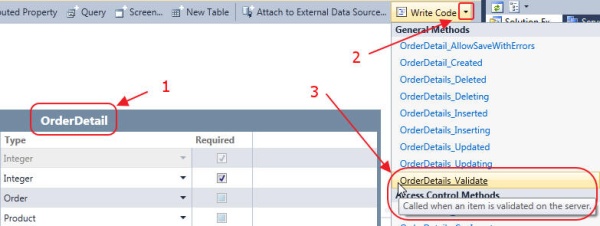
Open the OrderDetail Entity and select Write Code, then OrderDetails_Validate.
Use the following code for the method:
partial void OrderDetails_Validate(OrderDetail entity,
             EntitySetValidationResultsBuilder results)
{
    // Total for order cannot be over $100
    if (entity.Order.OrderTotal > 100)
    {
        results.AddEntityError(String.Format(
           "Total order cannot be over $100.00"));
    }

    // Weight for order cannot be over 10 lbs
    if (entity.Order.OrderWeightTotal > 10)
    {
        results.AddEntityError(String.Format(
          "Total Weight for order cannot be over 10 lbs"));
    }
}
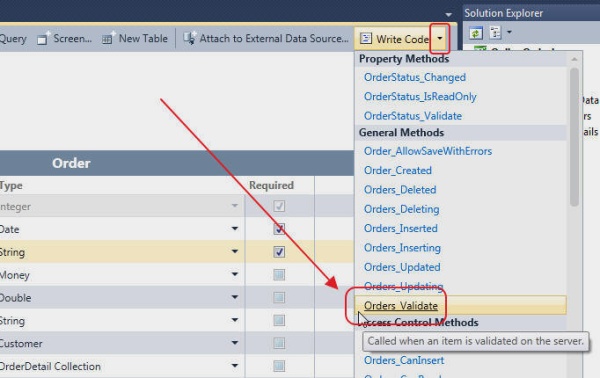
Select the Orders_Validate method on the Order Entity.
Change the method to the following:
partial void Orders_Validate(Order entity,
        EntitySetValidationResultsBuilder results)
{
    // Weight for order cannot be over 10 lbs
    if (
        (entity.OrderStatus != "New") &&
        (entity.OrderStatus != "Processing") &&
        (entity.OrderStatus != "Complete")
        )
    {
        results.AddEntityError(String.Format(
          "The only valid Status is 'New', 'Processing', or 'Complete'"));
    }
}
Note, LightSwitch will automatically create a dropdown for the OrderStatus field because it is using a choice list; however, you can still override this and change it to a text field. In that case, you would need this validation.
PreProcess Queries
PreProcess Queries allow us to alter the query used to access data. The normal query is executed, but any PreProcess method will add an additional constraint to the query. In this example, we will use it to:
- Allow a Company (a non-administrator) to see, and only place orders, for themselves.
Essentially, we will only apply the PreProcess query if the user is not an Administrator. We will apply this query to the Entities that we will give a Company access to if they log into the application:
- Customers
- Orders
- Order Details
We will prevent a Customer/Company from accessing the Companies screen (that we will create in a later step). Also note, while we do not plan to allow a Customer to see the master Companies screen, we do need to set the security so that any drop down that shows Customers is constrained to only show a Customer's own record.
This is an example of learning to think "in the LightSwitch way". You want to implement business rules and security at the Entity level whenever possible. Any screen or drop down that you create later will automatically follow the rules you create. This saves an incredible amount of time, and makes the final application far more stable and robust than simply creating code at the time a list or dropdown is displayed on a screen.
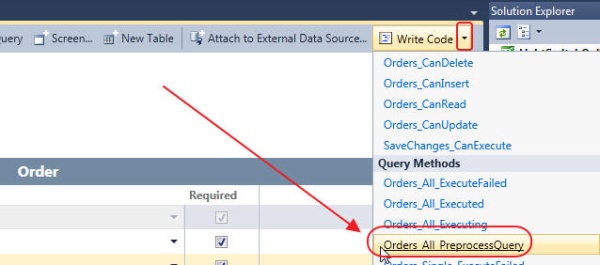
Open the Order Entity and select Orders_All_PreProcessQuery.
Change the method to the following:
partial void Orders_All_PreprocessQuery(ref IQueryable<Order> query)
{
    // This will run if the user is not an Administrator
    bool IsAdmin = this.Application.User.HasPermission(
                        Permissions.SecurityAdministration);
    if (!IsAdmin)
    {
        // This will restrict this query to Orders that belong to the current Customer
        query = query.Where(x => x.Customer.UserName == this.Application.User.Name);
    }
}
Perform the same steps for the OrderDetail Entity (OrderDetails_All_PreprocessQuery):
partial void OrderDetails_All_PreprocessQuery(ref IQueryable<OrderDetail> query)
{
    // This will run if the user is not an Administrator
    bool IsAdmin = this.Application.User.HasPermission(
                          Permissions.SecurityAdministration);
    if (!IsAdmin)
    {
        // This will restrict this query to Orders that belong to the current Customer
        query = query.Where(x => x.Order.Customer.UserName == this.Application.User.Name);
    }
}
Perform the same steps for the Customer Entity (Customers_All_PreprocessQuery):
partial void Customers_All_PreprocessQuery(ref IQueryable<Customer> query)
{
    // This will run if the user is not an Administrator
    bool IsAdmin = this.Application.User.HasPermission(
                          Permissions.SecurityAdministration);
    if (!IsAdmin)
    {
        // This will restrict this query to the current Customer
        query = query.Where(x => x.UserName == this.Application.User.Name);
    }
}
Creating Screens
Creating screens is very easy. In this example, we will just use the default screens, but they are highly customizable and you can also consume your own Silverlight custom controls. For more on this, see the tutorials on my site at: http://LightSwitch.ADefWebserver.com.
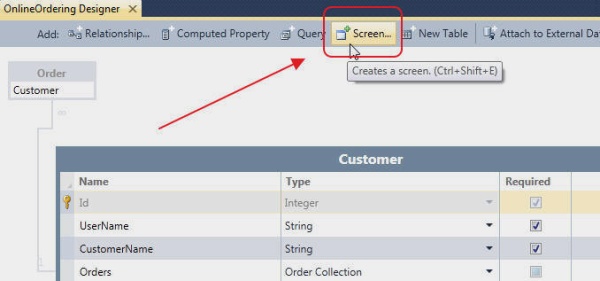
Open an Entity and select the Screen button.

Select the Editable Grid Screen template and select Customers for Screen Data.

The screen designer will appear and the screen will show in the Screens folder. This is the place where you would normally customize a screen. We won't customize the screens in this tutorial, but we will add a small piece of code to prevent the screen from being accessed by a non-Administrator.

Select Write Code, then EditableCustomerGrid_CanRun.
Change the method to the following:
partial void EditableCustomersGrid_CanRun(ref bool result)
{
    // User must be an Administrator
    result = this.User.HasPermission(Permissions.SecurityAdministration);
}
Perform the same steps to create a screen for the Product Entity.
Also, use the following code for the EditableProductsGrid_CanRun method of that screen:
partial void EditableProductsGrid_CanRun(ref bool result)
{
    // User must be an Administrator
    result = this.User.HasPermission(Permissions.SecurityAdministration);
}
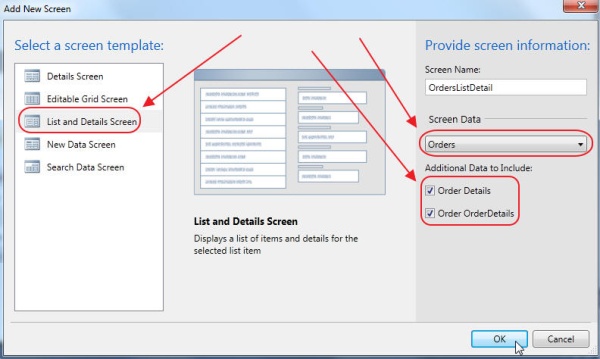
For the Orders Entity, select the List and Details Screen template, and select Orders for Screen Data, and Order Details and Order OrderDetails for Additional Data to Include.
Where is My Code?
You may get a bit nervous putting code in various places. You may wonder how you can easily find custom code that has been created in a LightSwitch project. This is not a problem.

In the Solution Explorer, select File View.
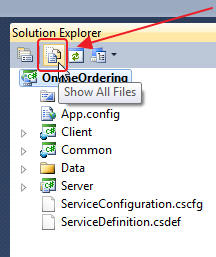
Select Show All Files.
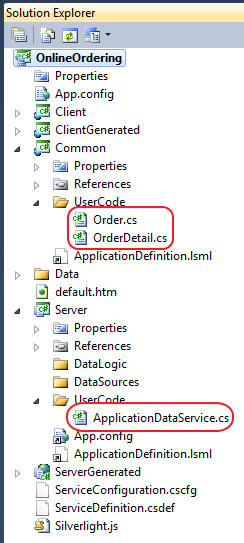
You will easily locate all the custom code you have written in the UserCode folders.
Run the Application
At this point, we have completed creating the application. If you are a professional developer and a cold chill just went through your body, you are not alone. Rest assured, a professional developer will still be needed to create LightSwitch programs like the one described at this link.
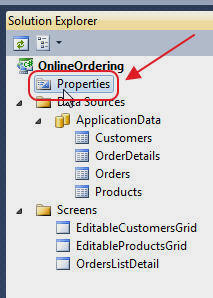
Before we run the application, let us look at the user we will be. Go into Properties...

Select Access Control, and ensure that Granted for Debug is checked for SecurityAdministration. When we run the project in Debug mode, we will be a user called TestUser. That user will be an Administrator when we have that box checked.
Later, we can uncheck this box, and we will be able to see what a normal Customer would see when they run the application. However, that Customer will have to have an account in the user table as "TestUser" because that is who you always are when running a LightSwitch application in Debug mode.
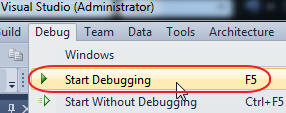
Hit F5 to build and run the application.

You will automatically be logged in as TestUser. When we deploy the application, a log in screen will show first.

We enter two Customers. We make sure one of the users is "TestUser".
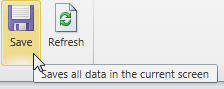
Make sure you hit the Save button to save your data.
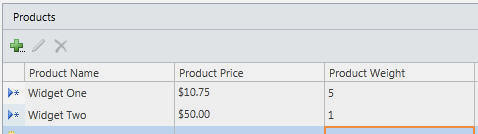
Enter a few Products...

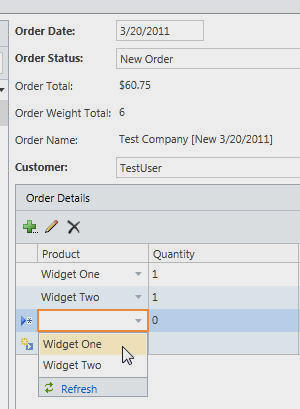
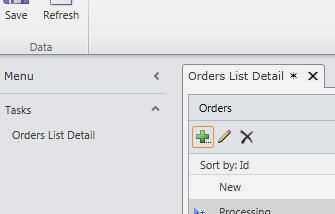
When we go to the Order List Detail screen, we can click the big green plus button to open the Add New Order popup.
(Yes, you can control the design and layout of all these screens and popups (including preventing popups), but notice how much has been created for us with little effort on our part.)
We can add Order Details to the Order.

If we stop the program and uncheck the Granted for Debug box and then hit F5 again...
We see that the only screen we can access is the Orders List Detail screen, and we can only see and place orders for "TestUser".
Deploy the Application
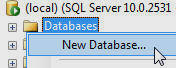
Create a database in SQL Server. Make sure you have an account that has database ownership.
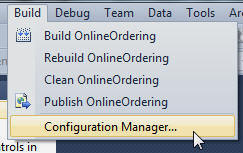
In Visual Studio, select Build, then Configuration Manager.

Change to Release mode (if you don't do this, you will see the "screen design" box in the deployed application).
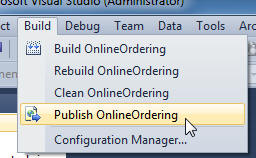
In Visual Studio, select Build then Publish OnlineOrdering..

Select Web.

Select IIS.
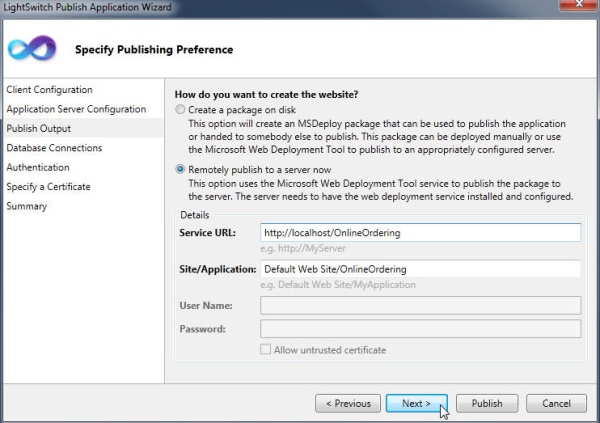
Enter the address you want to deploy the website to (this server must have the LightSwitch Deployment Prerequisites installed; there is a link for it on the previous page of the wizard).
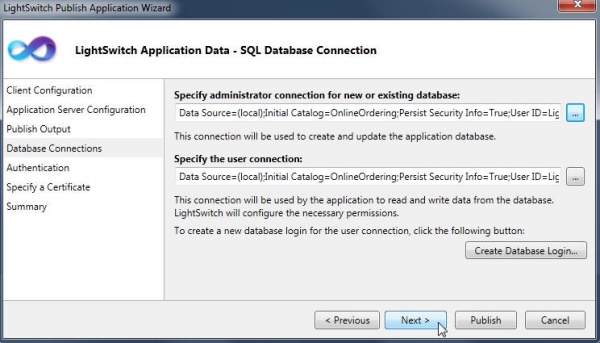
Enter the SQL Server account you created earlier.

On this screen, you need to create a user for the application. The first time you run the application, this will be the only user. This is the user you will need to log in as, to create accounts for all the other users.

You can just click Next on the Specify a Certificate page.

Click Publish.

Navigate to the website in your web browser. Log in using the account you created in the wizard.
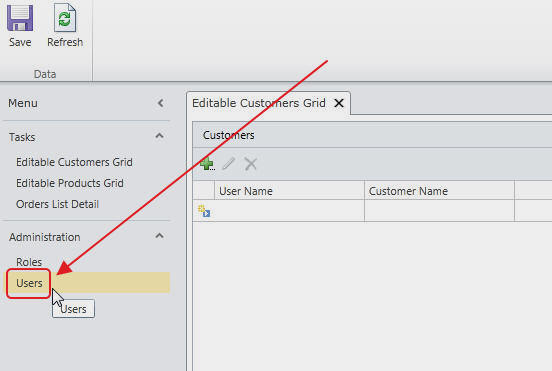
Because this user is an Administrator, it is able to see Administration in the Menu. Click on Users.
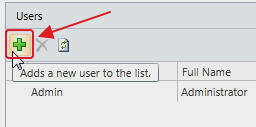
You will be able to create other users.
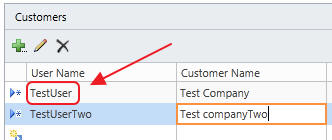
When you make entries in the Customers screen, make sure the User Name matches the User Name created on the Users screen.

If you close your web browser and log in as the user you created, you will see that the user is only able to place and view their own orders.
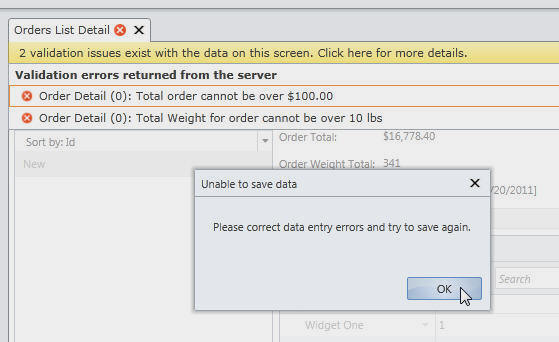
All the business validation will also work.
You Can't Put the Genie Back in the Bottle
If you are a professional developer, you have to accept the truth, things have changed permanently. The days of six figured budgets to employ half a dozen developers on a run of the mill LOB application for weeks may be over. While some projects will still need costly customized HTML front-ends, the majority of any application is "back office stuff", and that can be done in LightSwitch by a single developer in only days.
The good news is that LightSwitch will primarily be used to replace projects that are currently done manually in Excel. The market for forms-over-data applications just got a lot bigger. However, any project that can be done in LightSwitch can be completed with a 75%+ savings in time and cost. The only way to compete is to use LightSwitch wherever it is appropriate.
I have more LightSwitch tutorials on my site at http://LightSwitchHelpWebsite.com.
 "
"